Build a Workflow
A workflow defines a sequence of actions called Node to be executed by Butternut. For each scenario, you specify the trigger source, and how the data is to be processed. BUtternut lets you create as complex of scenarios as you need.
Create a workflow#
Go to the Workflows page. Click on "+ NEW WORKFLOW".

Give your workflow a
- name (mandatory)
- description (optional)
- category (optional)
Then click "Create".

Configure a workflow#
Click on the configuration button (the wrench) to open the configuation form.

Here you can configure the workflow properties (name, description, category). You can also delete the workflow, manage the deployments on the different environment you have and find the webhook to trigger a workflow's execution.
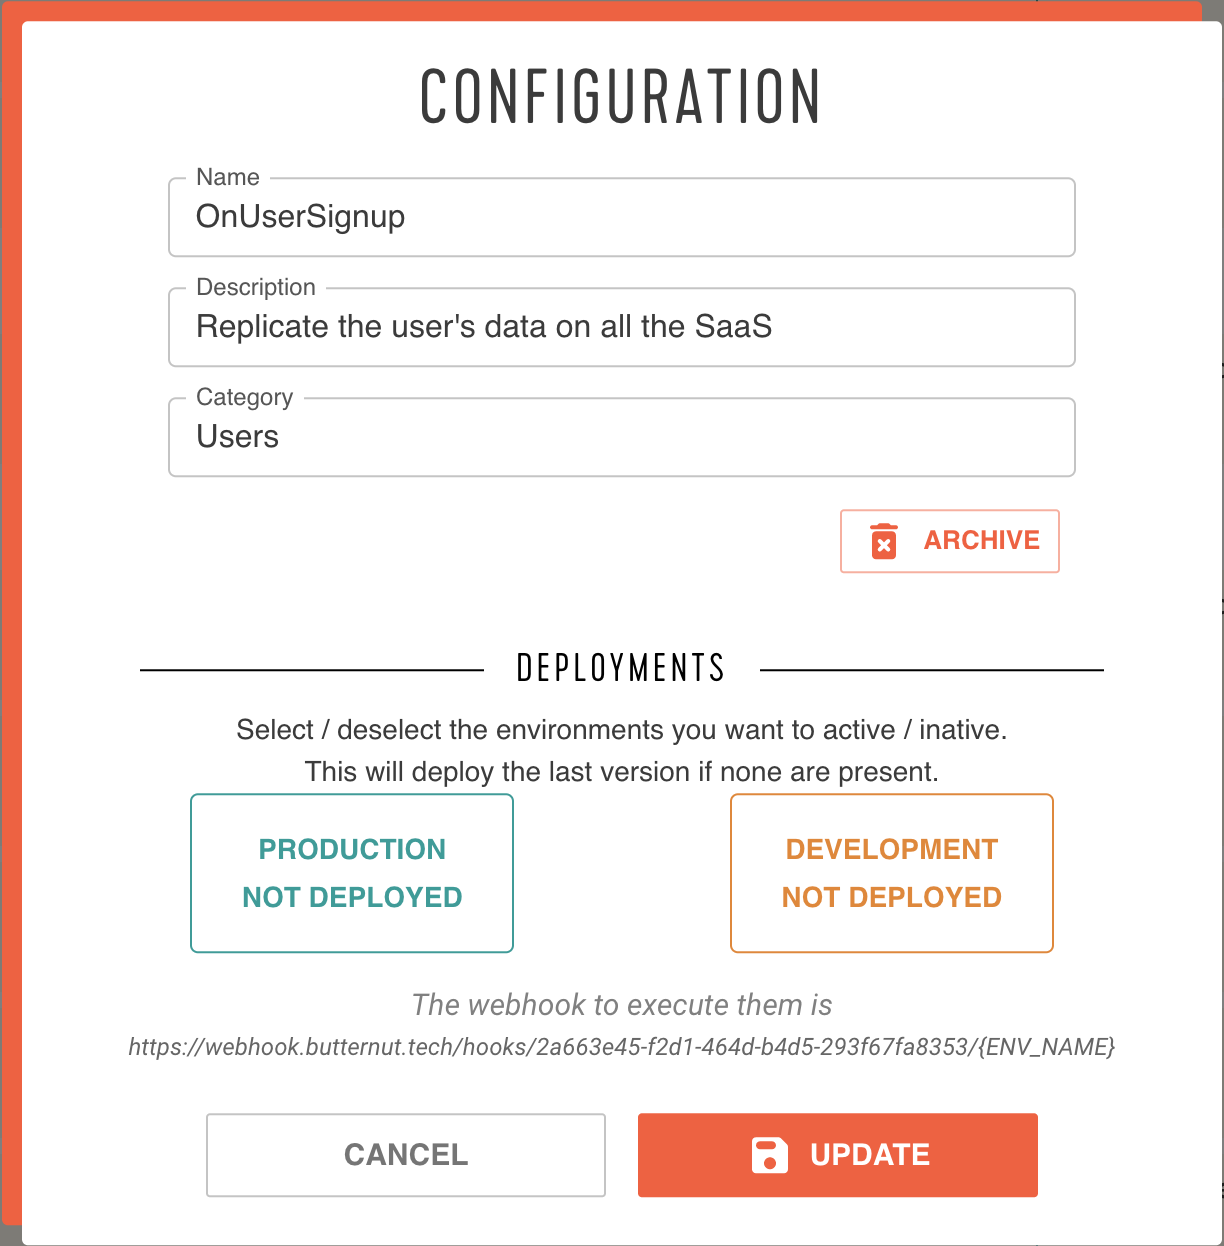
Then click "Update".
Setting up the workflow content#
Once you selected the workflow you want to set up, you are now in the workflow editor.
Butternut workflows are composed of nodes. Every node does a specific task, like send a http request, use a Saas, add conditional logic or use basic function on your data. We can place nodes anywhere on our canvas. Drag them around and connect them to each other to pass data.
Trigger#
The first node of every workflow is the trigger node. You can use the trigger node on two differents ways: Webhook or Scheduled
Nodes#
Click on the "+" on the toolbar to list all the nodes available.

Then choose the node you want to work with. Once selected the node will appear in the canvas, you can now configure it. To delete a node in your workflow, open the node configuration by click on it then click on the delete button
Link nodes#
Each of the other nodes has an input and an output. Click and hold from the output of a node to the input of another to link them. You can link an output to multiple inputs if you want to parallelize nodes.
There are some exceptions which do not have an input and output like the other nodes:
- Trigger has no input because it is the first node of the workflow
- If has two differents outputs, one in case of the condition success and the other in case of failure
- Try Catch which has two outputs on the catch part depending if there was an error on the nodes executions between the try node and the catch node
To remove a link between nodes, pass your pointer on the link then click on the trash button.
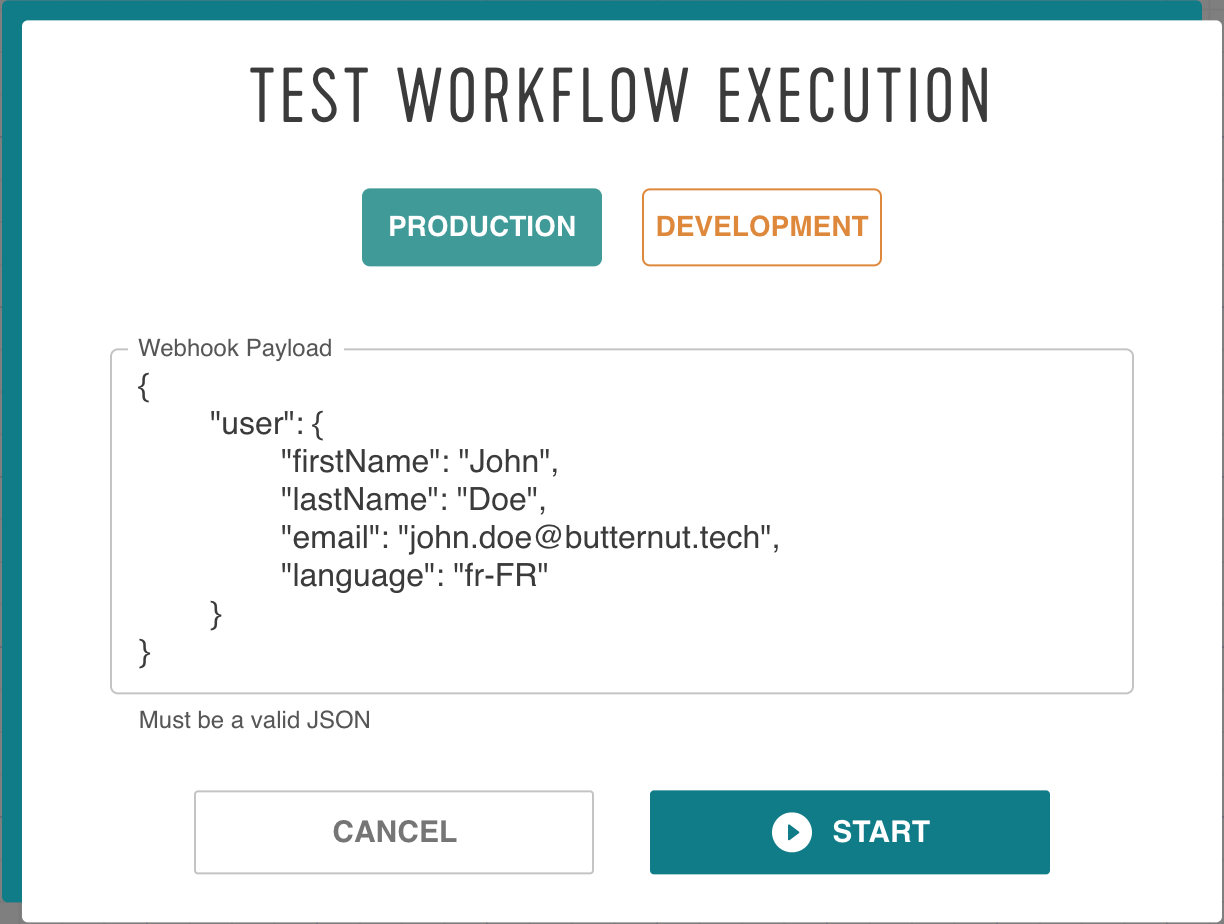
Test#
You can test your workflow before running it with real data.
Click on the "TEST" button. Choose the environment you want to run your workflow. Add in the payload section the data you want to send to the workflow's webhook
Save & Deploy#
Click on the "SAVE" button. Add a description of the changes you did on the workflow. Select if you want to create a major or a minor version. Choose (or not) the environment you want to apply your new version.
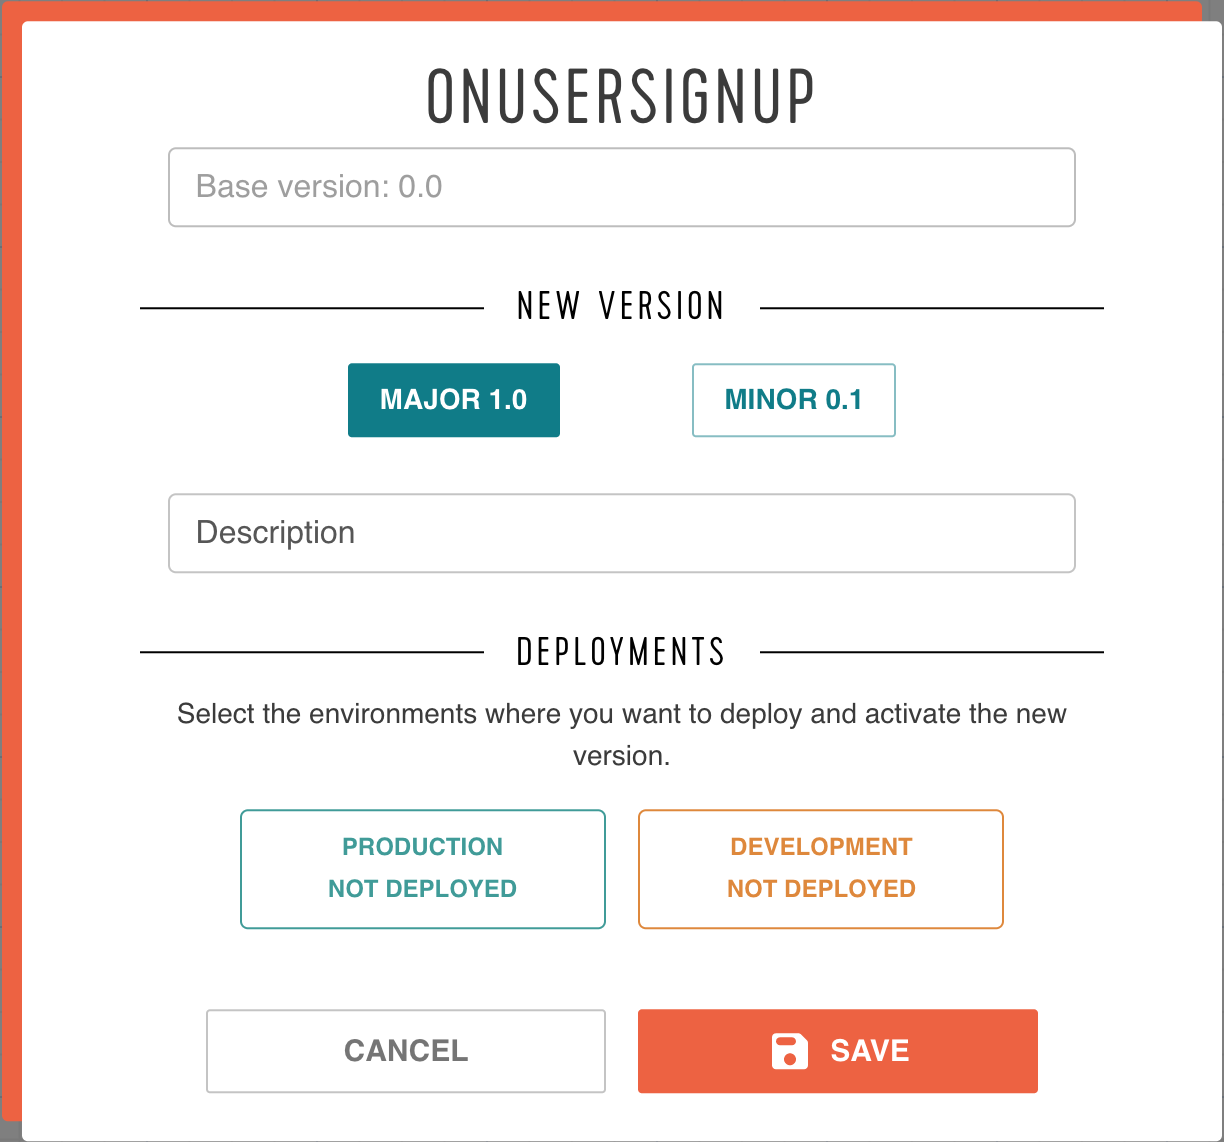
Then click on save
If you get stuck at a point above, please reach out to support@butternut.tech or via this form.
We're here to support you, and together we can build great things.