Getting Started
In the following tutorial, I show you in less than 3 minutes how easy it is to create a simple scenario to receive a Slack message when someone pushes on the branch "master" of your Git repository.
Video tutorial#
Step by step#
1. Create the workflow#
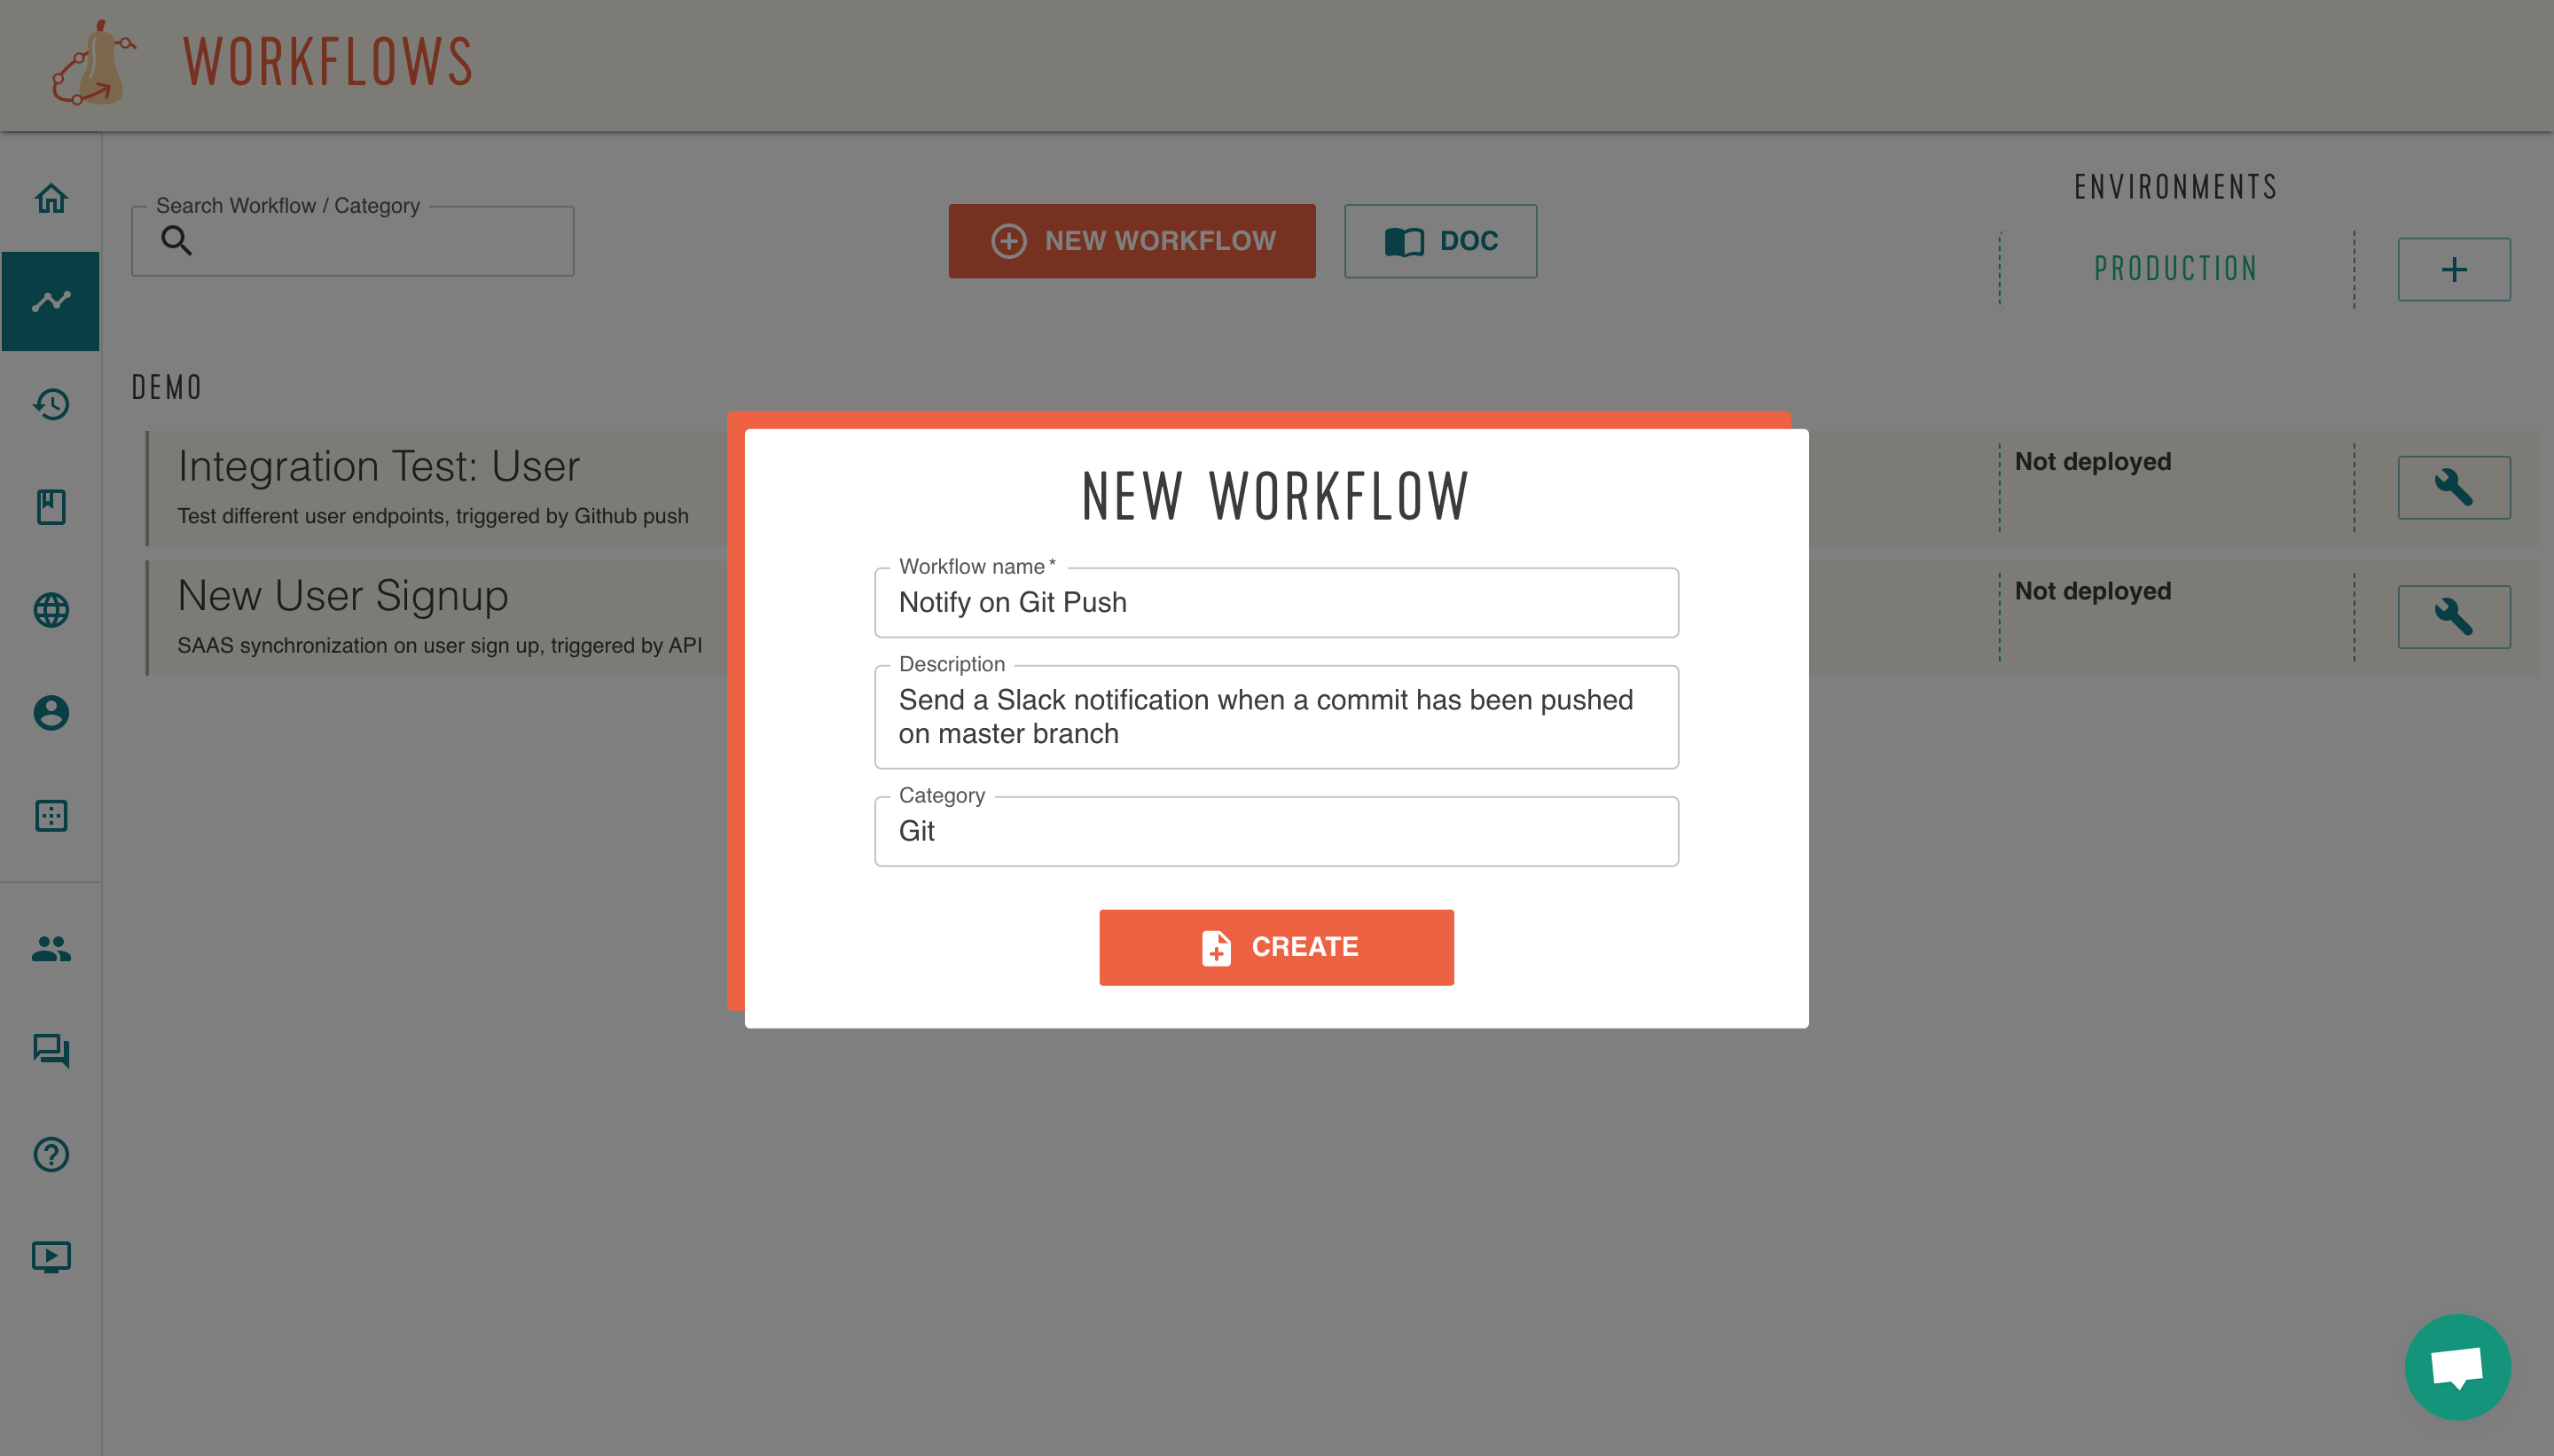
Create and name your workflow, you can add a description and a category to order it.
2. Configure the trigger#
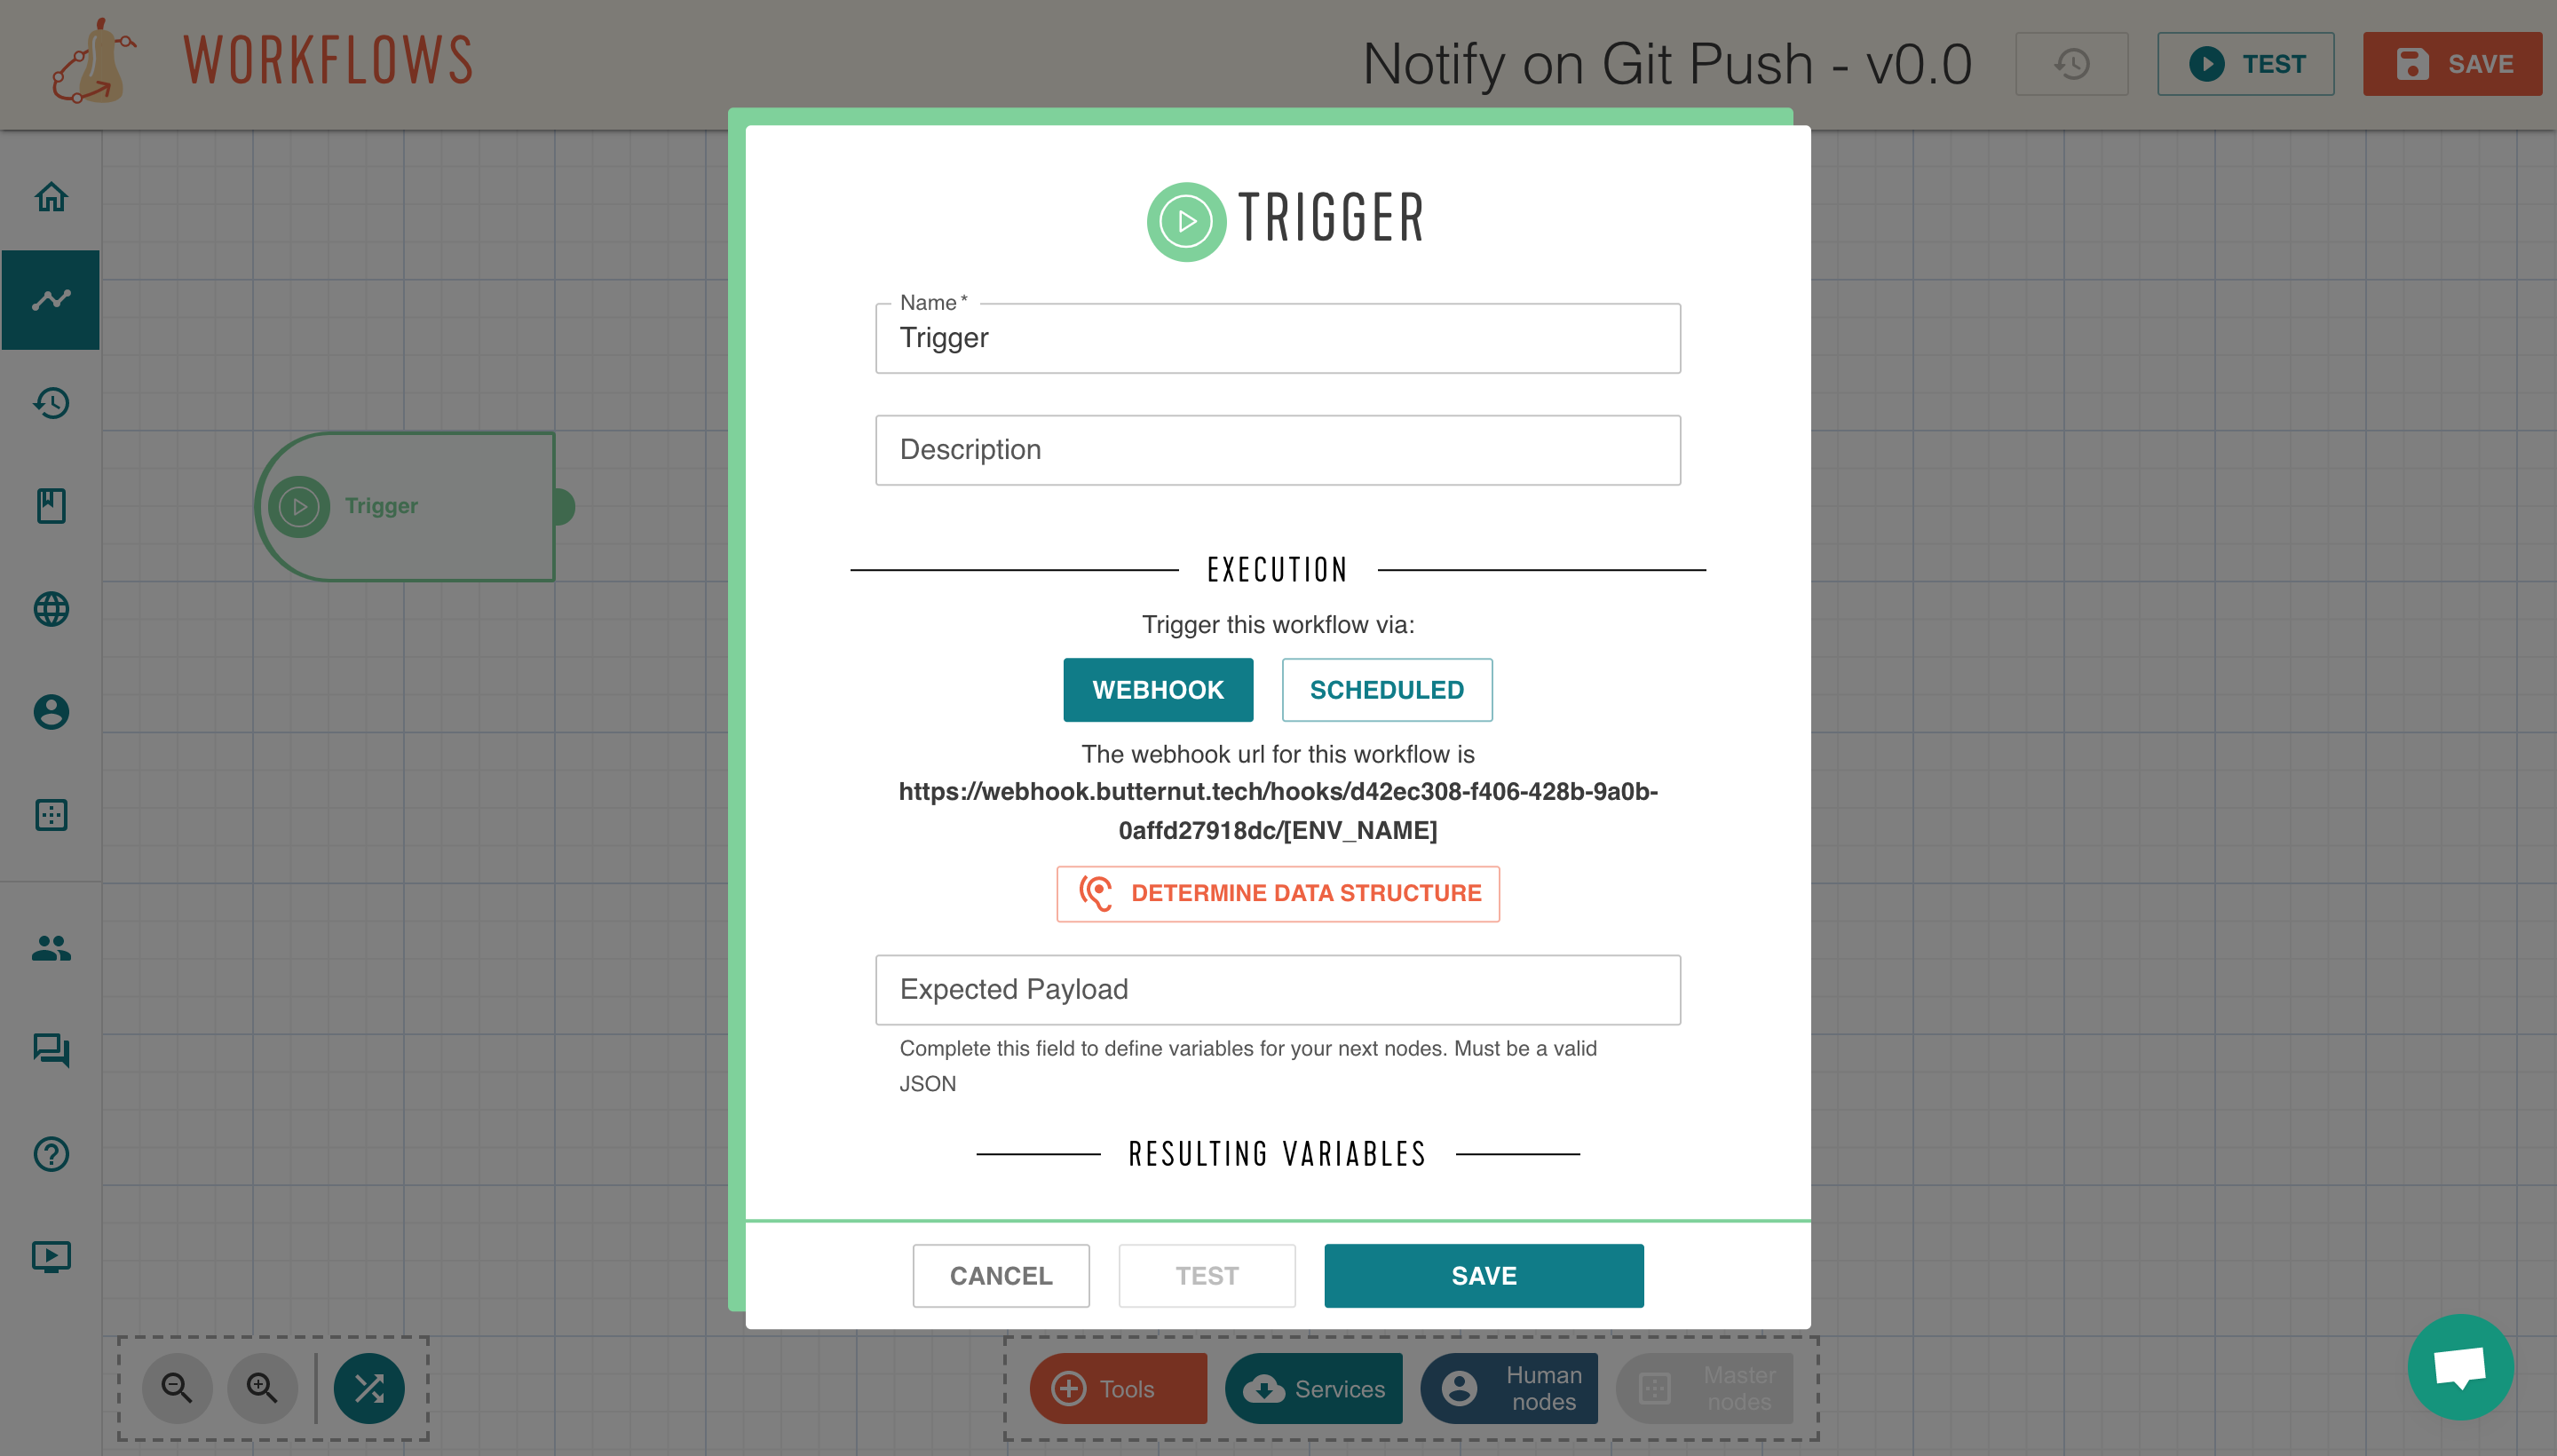
The first node already in place allows you to define how you want to trigger your workflow, here we leave it in webhook position. The webhook url is indicated.
3. Connect the Github webhook#
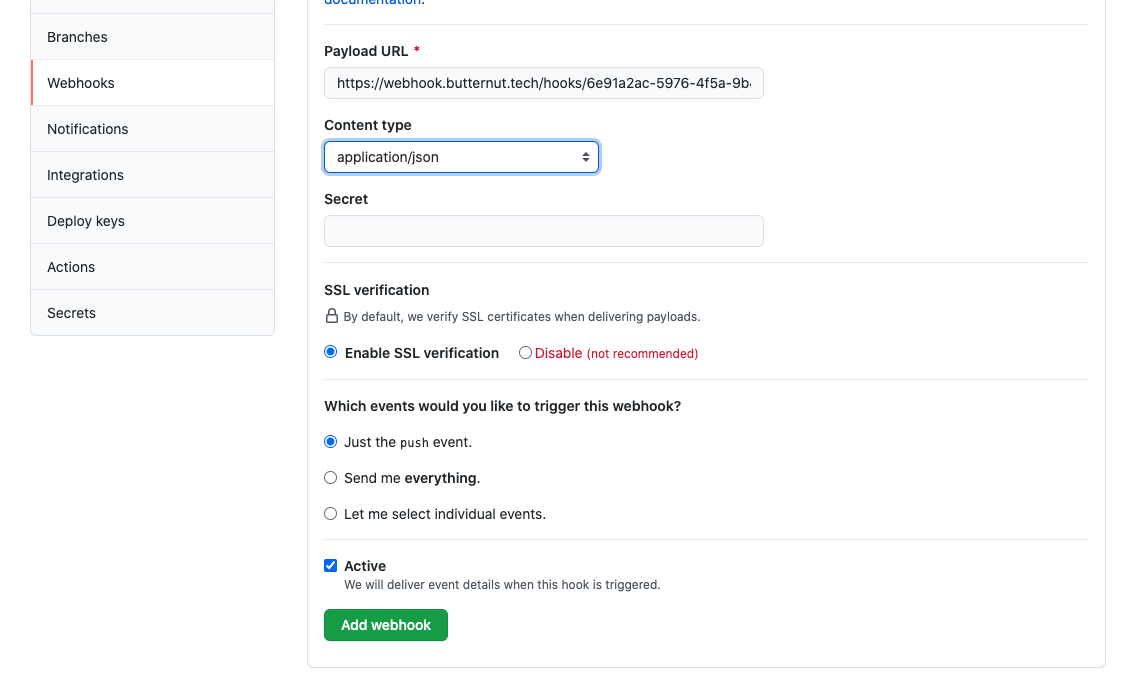
From the settings in your Github repository, you can add the webhook to call when an action is done.
Don't forget to set the desired environment.
4. Describe the data paylaod#
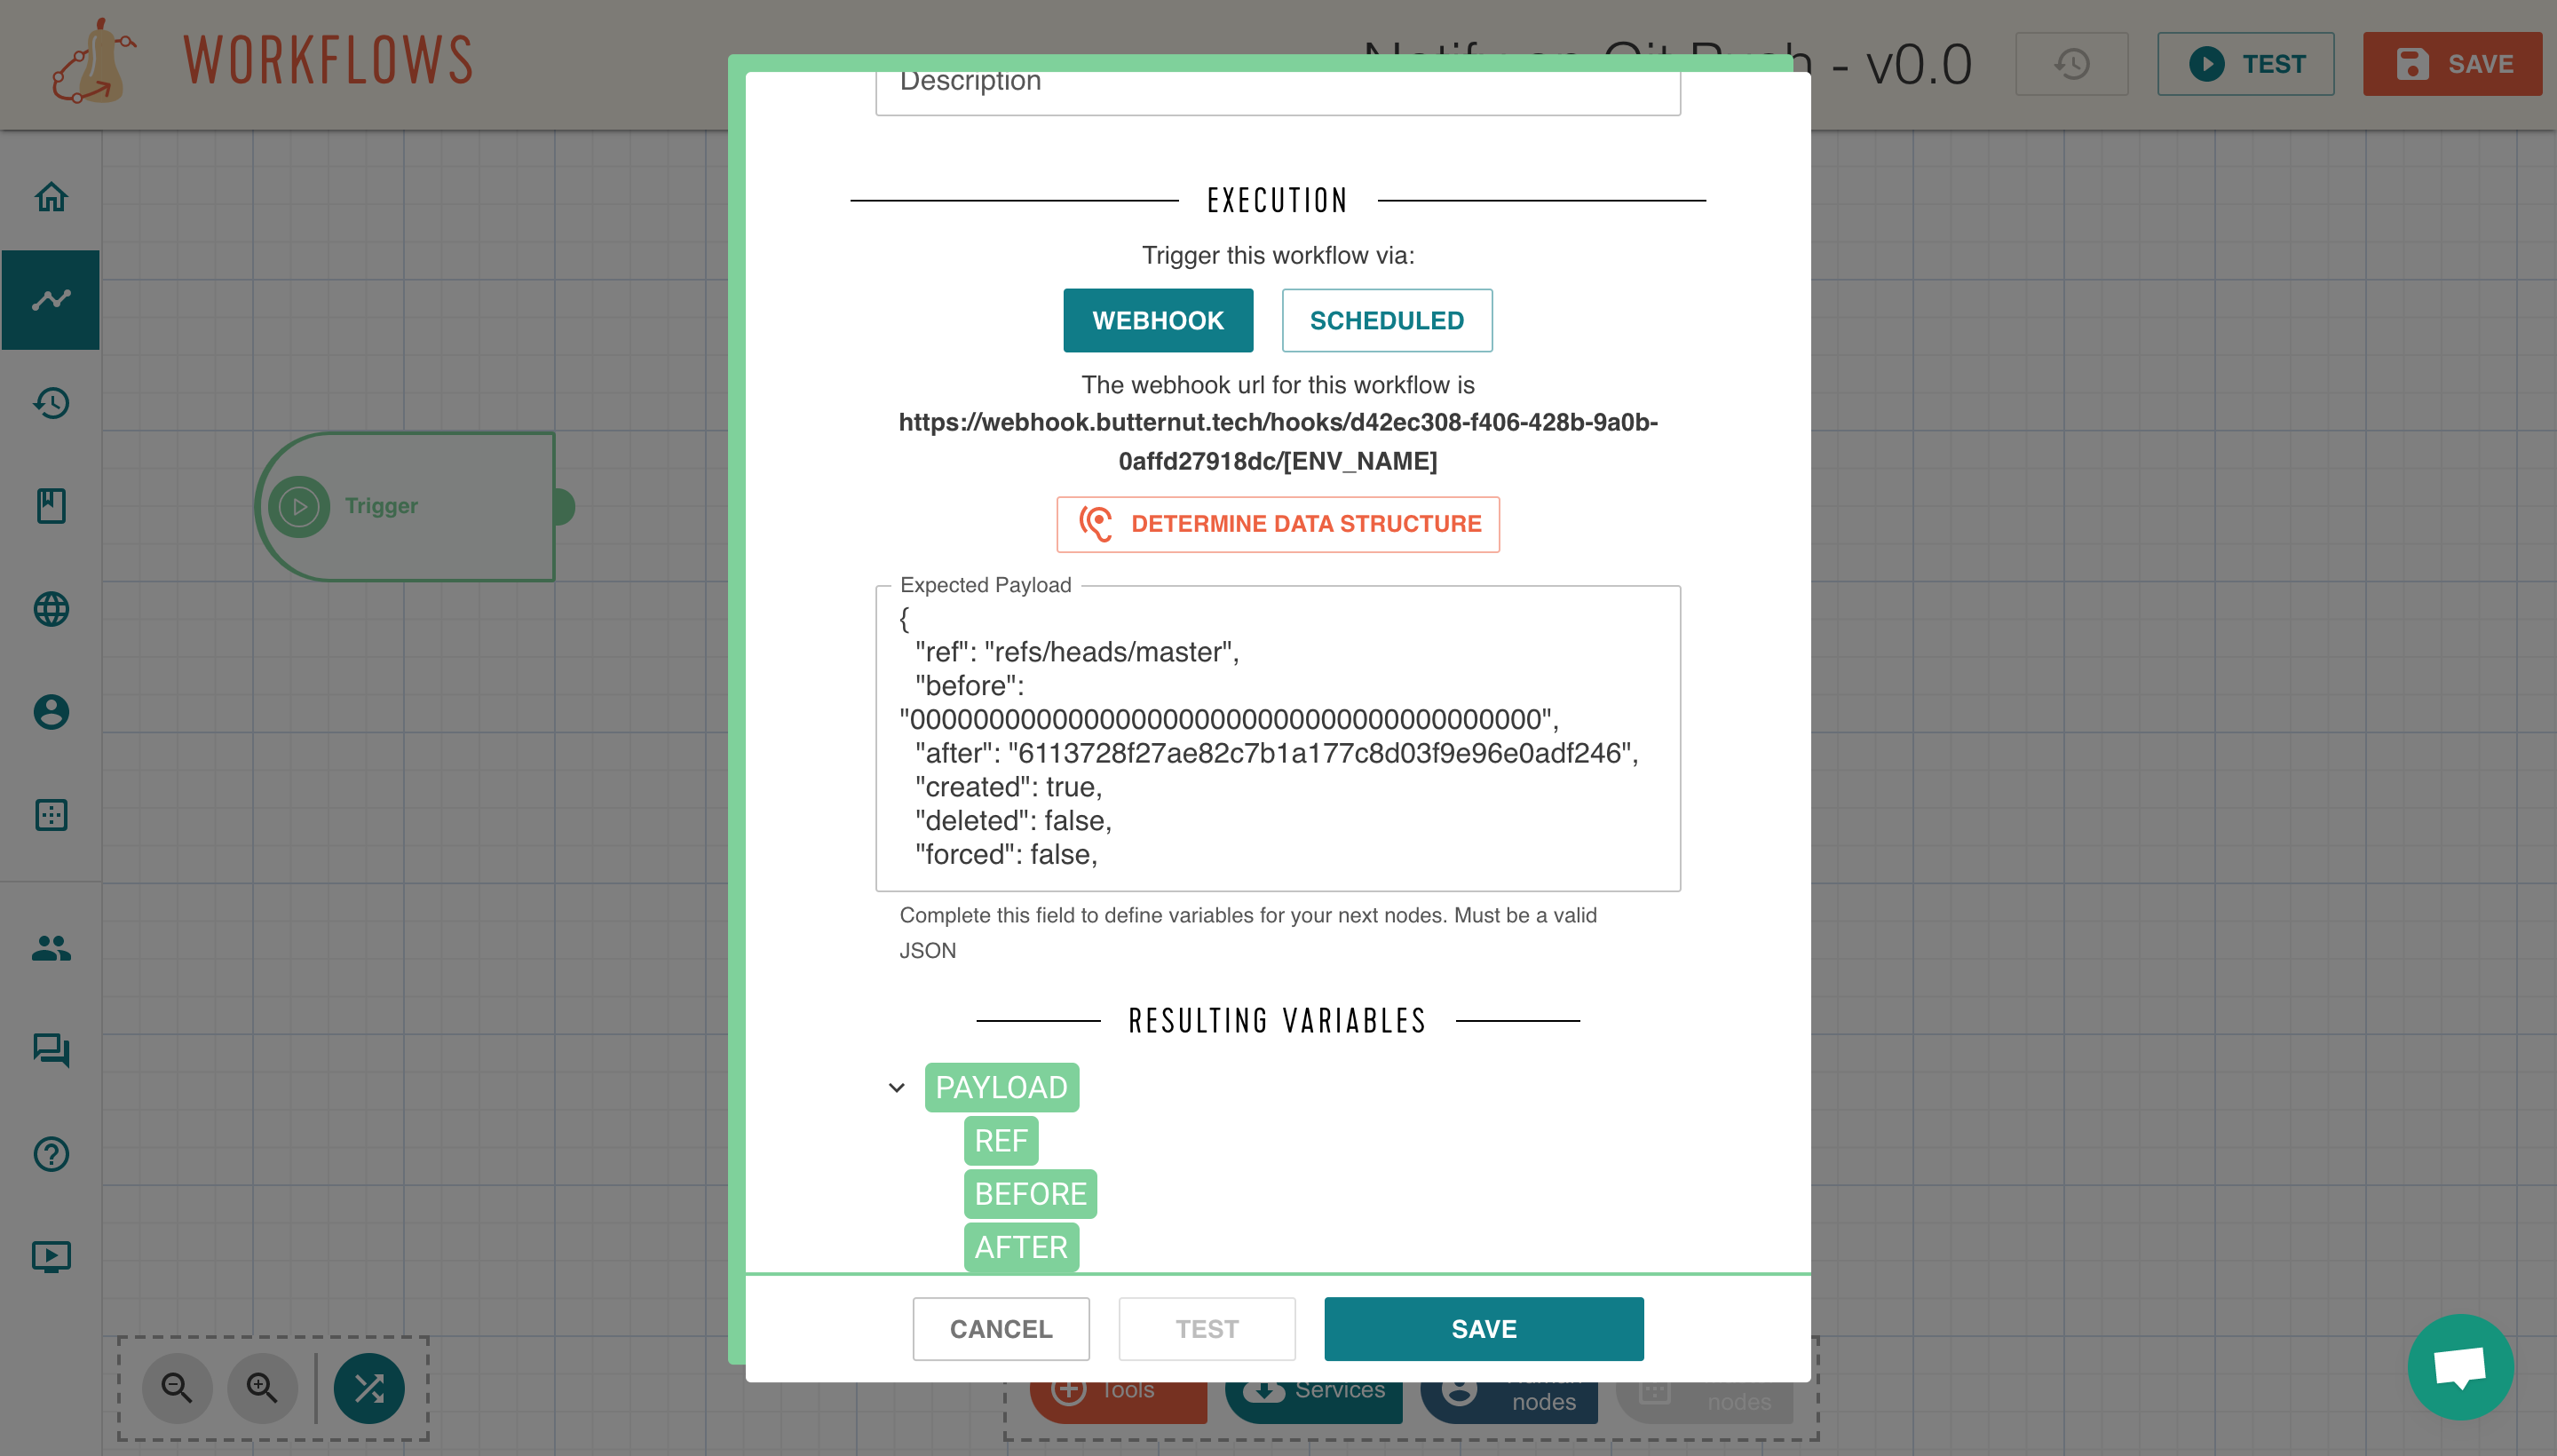
Then you have to describe the payload that will be received in order to define the variables for the rest of the workflow.
You can use the listen feature or define it manually in JSON.
5. Add & configure the node "If"#
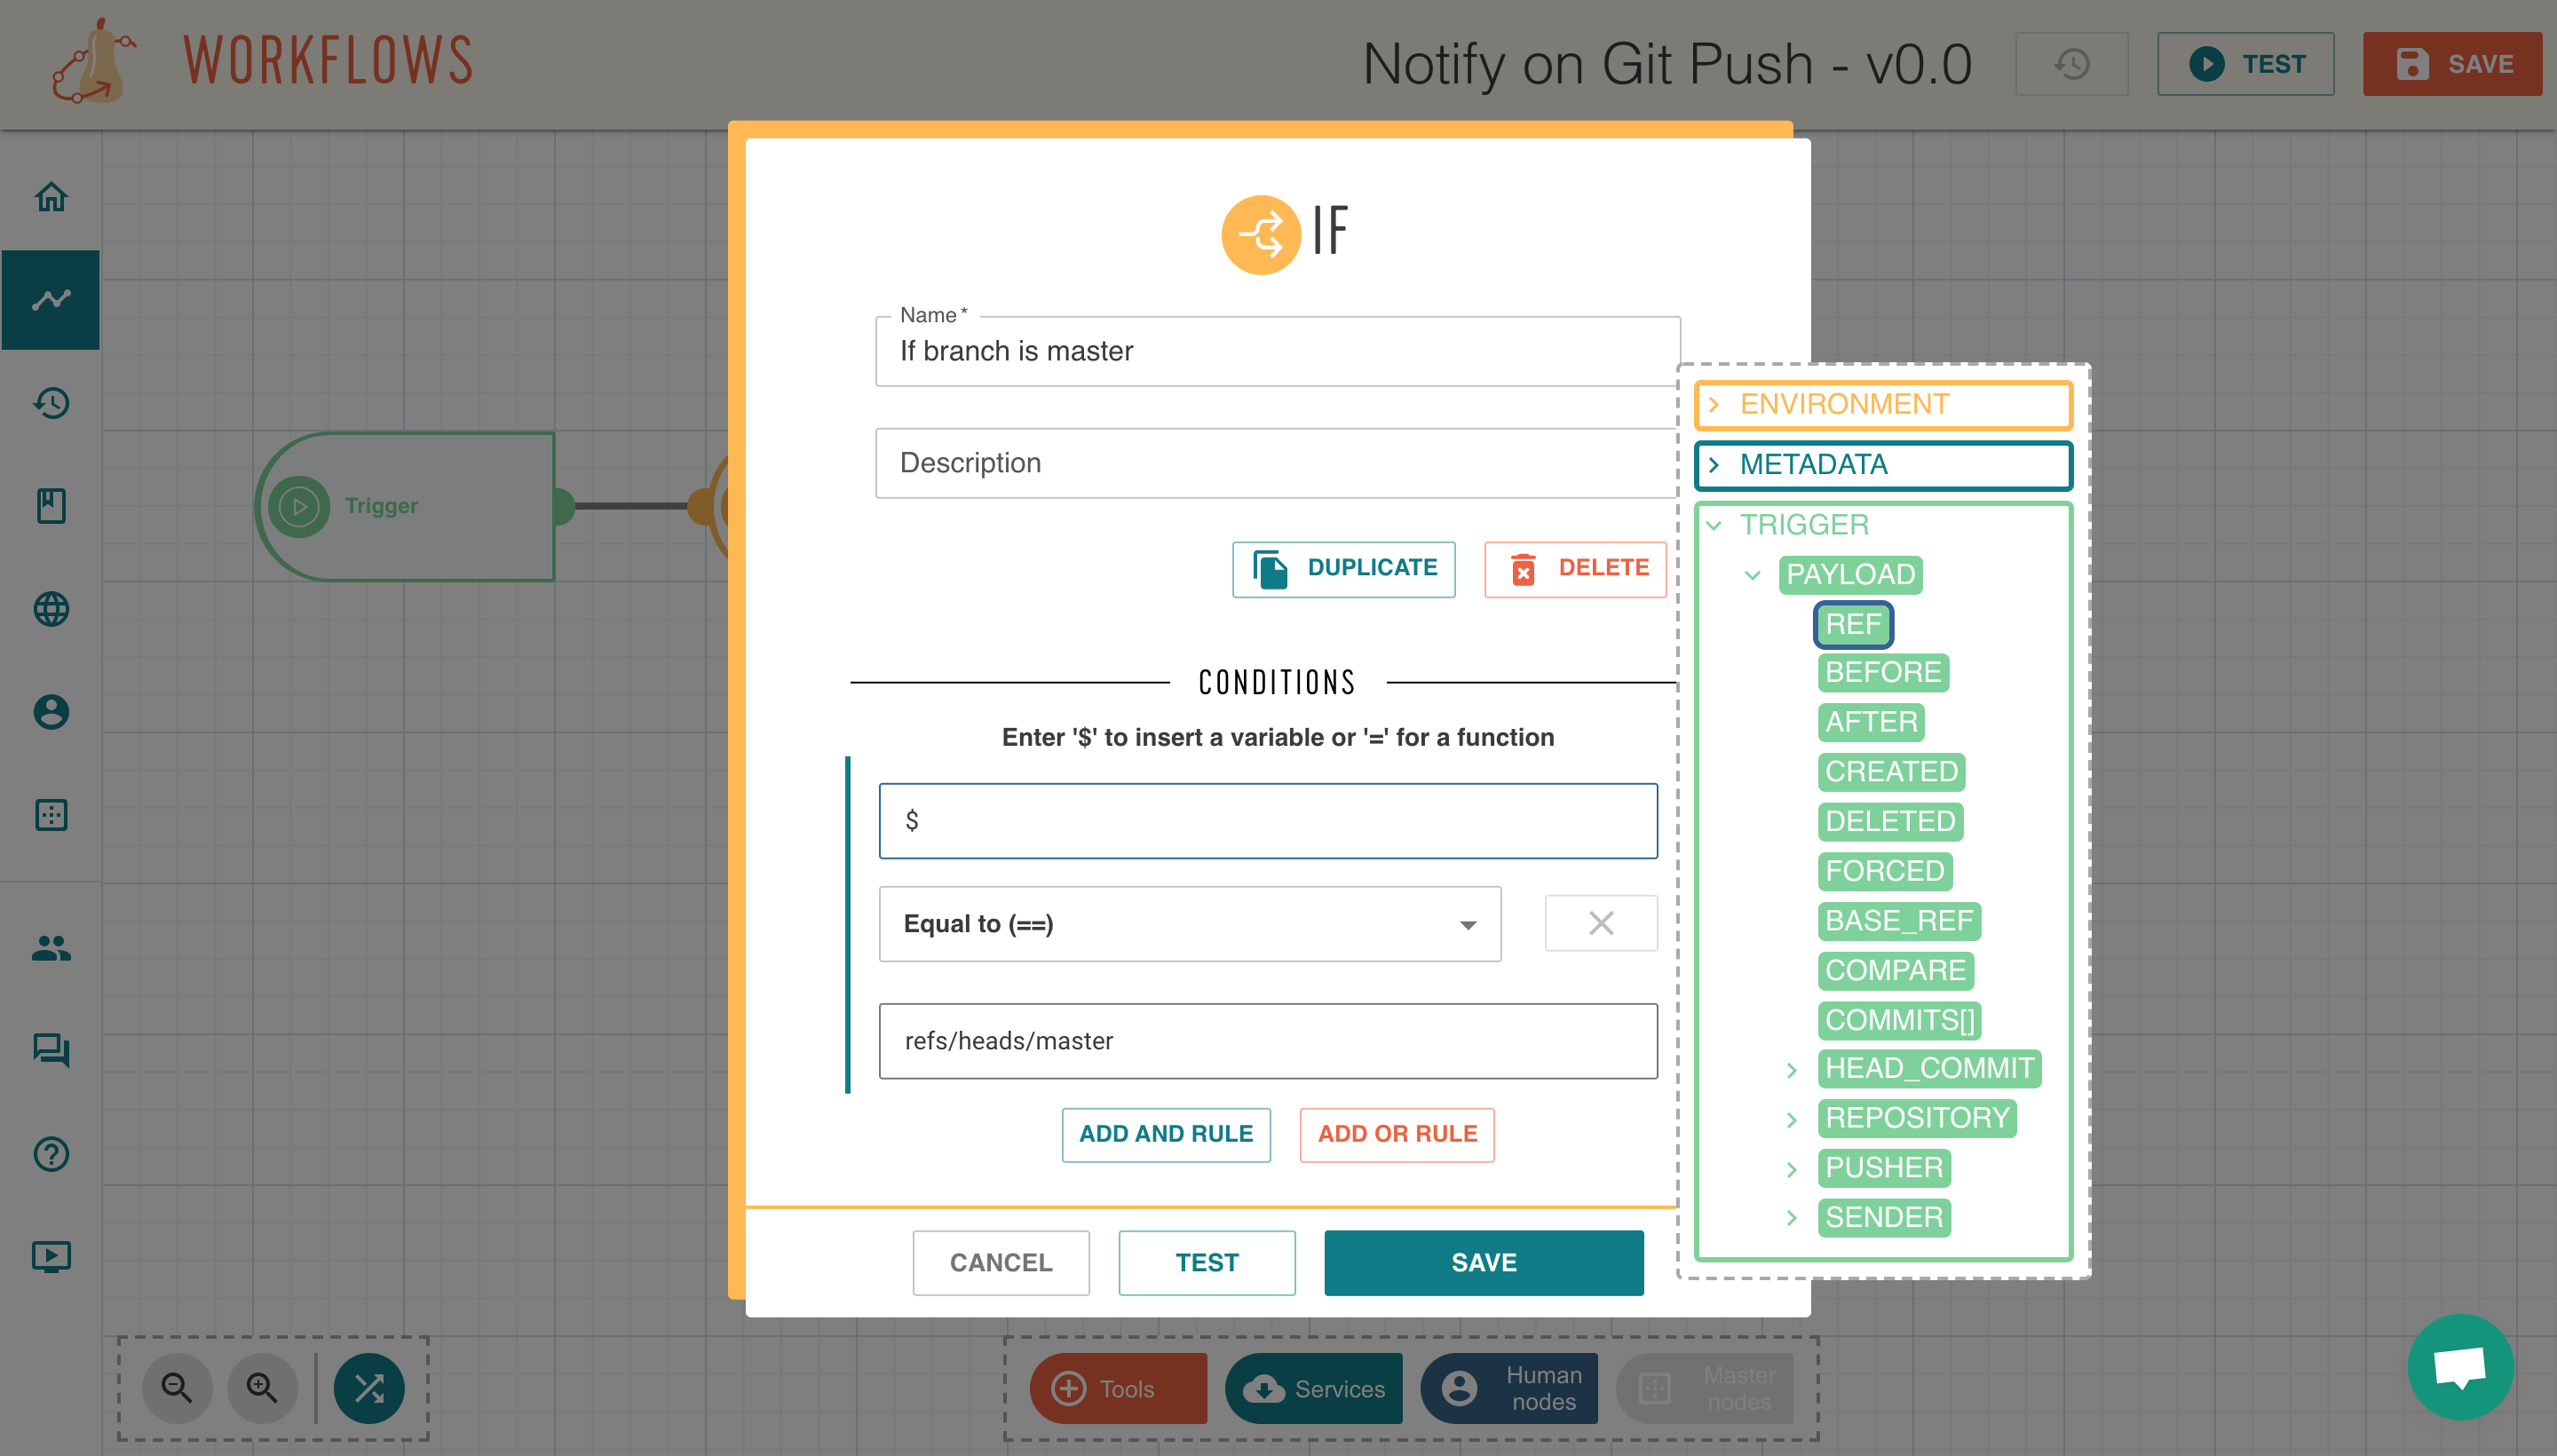
Add an "IF" node to check only process pushes on the "master" branch. The variable "REF" defined in the trigger must be used here.
6. Send the slack message#
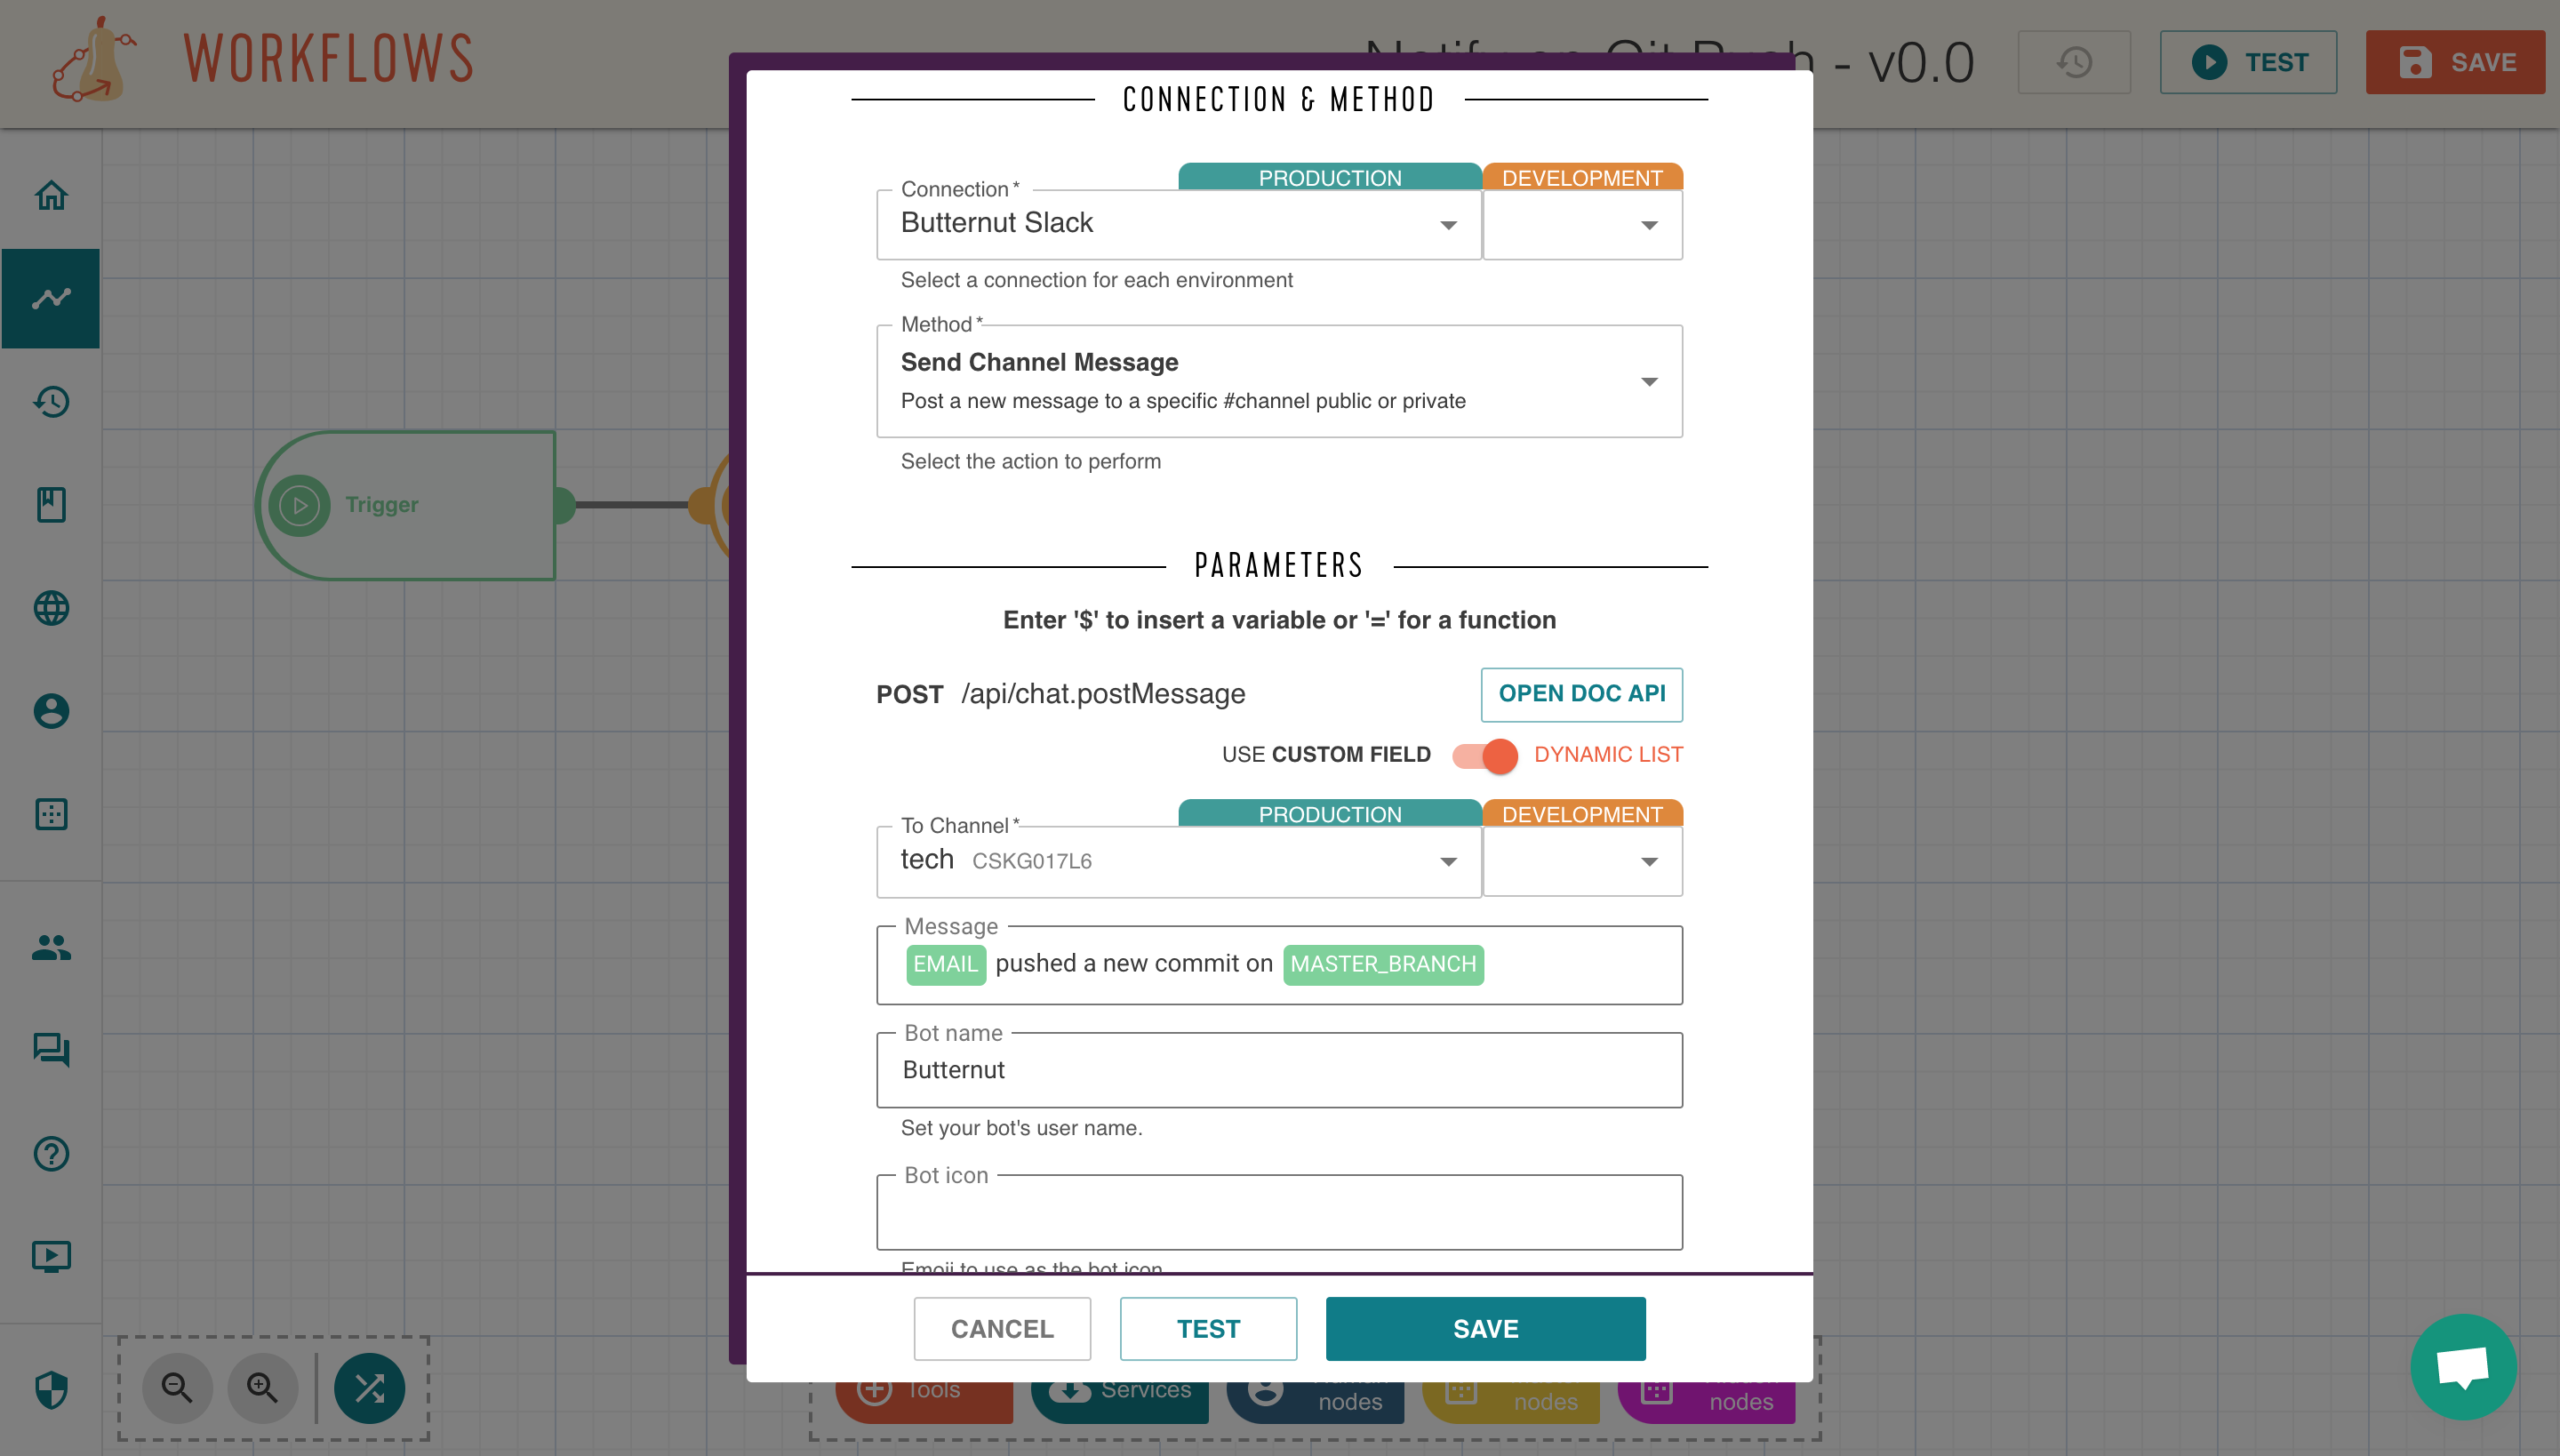
And finally to send a Slack message, you can use the "Slack" node.
Pick the connection associated to your Slack account and select the "Send Channel Message" method.
Fill the differents fields to customize your message. You can also use variables defined in the trigger to complete the content of the message.
7. Test it!#
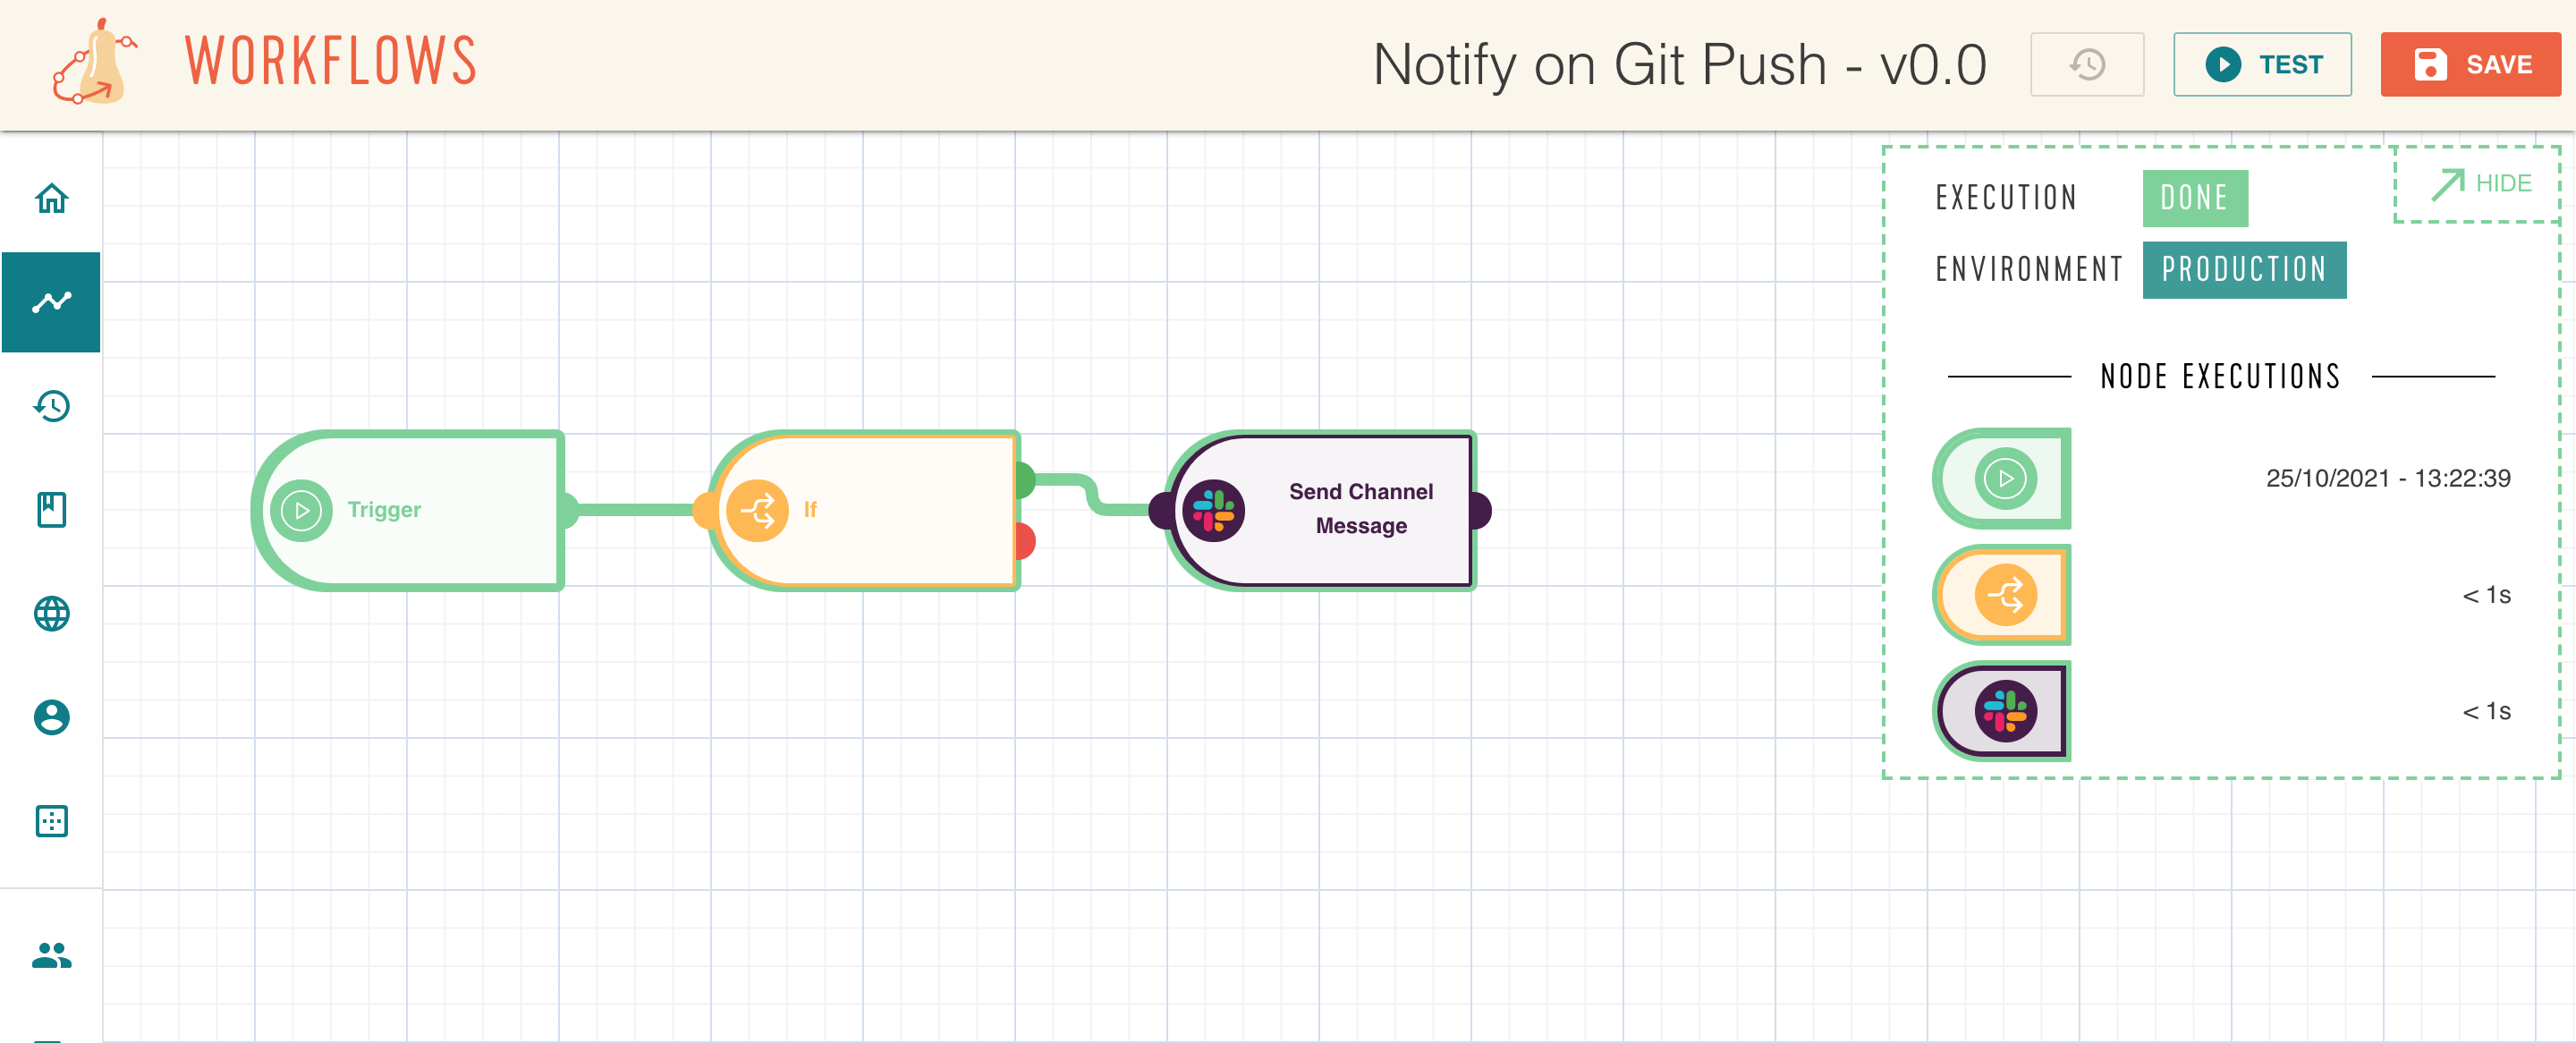
Don't forget to test the whole workflow to make sure that everything works by clicking on "TEST" in the top right corner.
The result of each operation can be displayed, ideal in case of error!
8. Save & deploy#
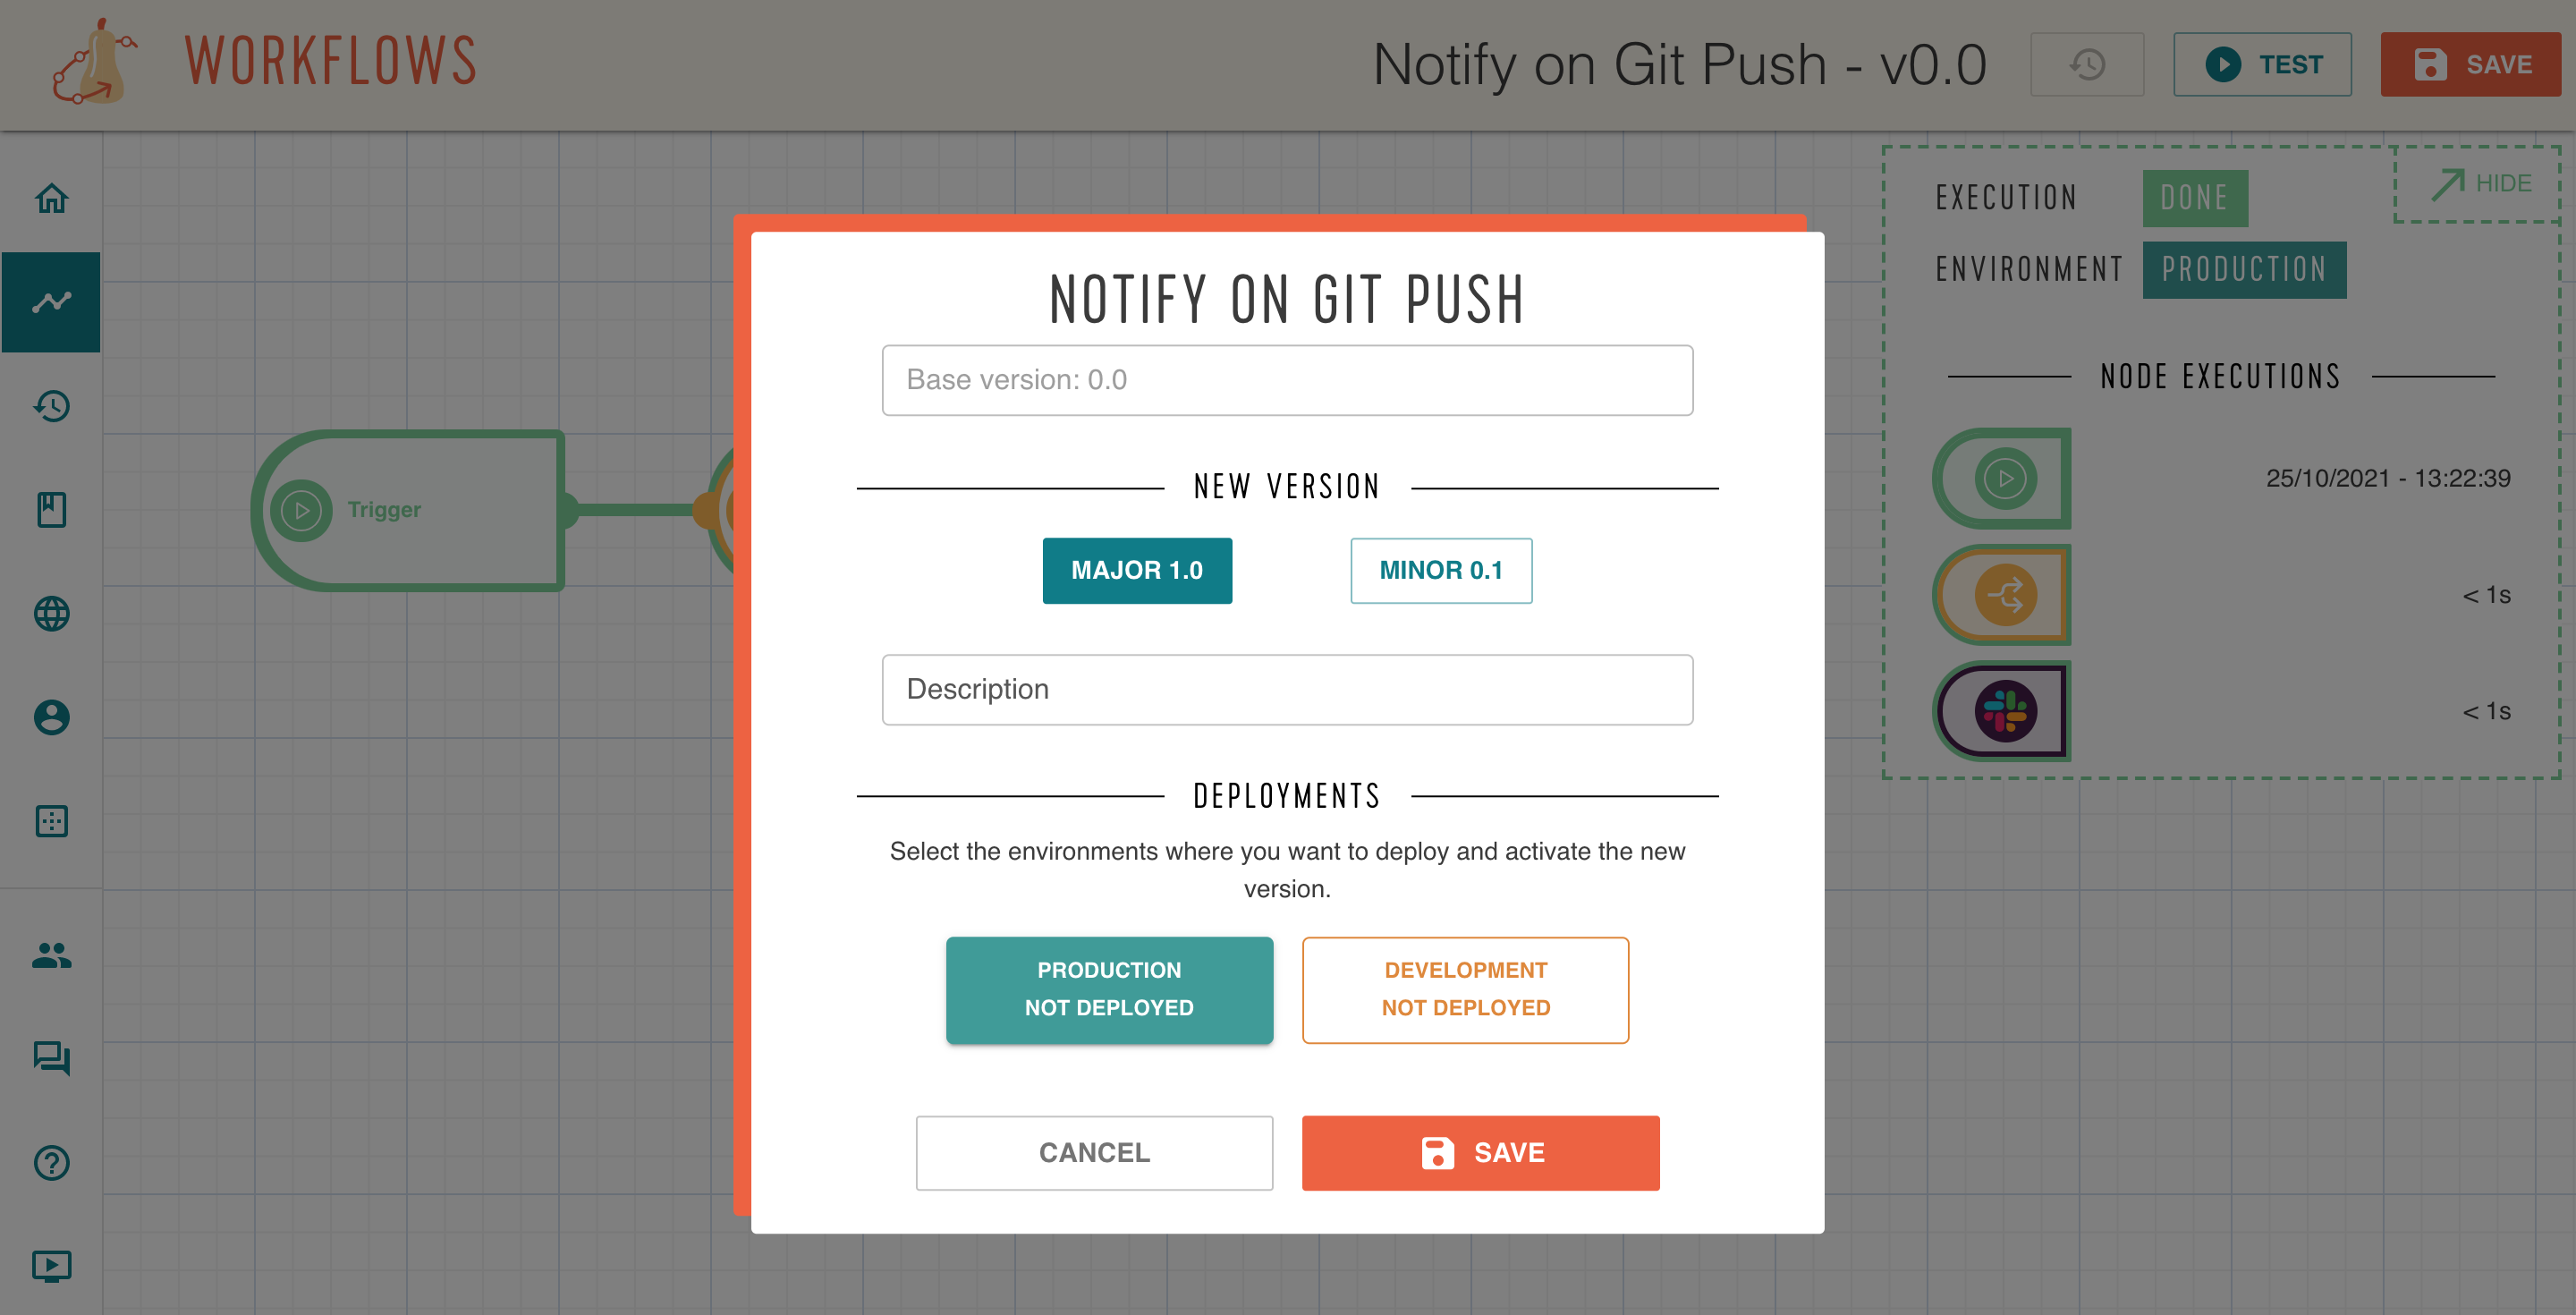
Last step, save and deploy the workflow, it will be executed on your next git push.
If you get stuck at a point above, please reach out to support@butternut.tech or via this form.
We're here to support you, and together we can build great things.